
At some point in our lives, all of us are going to have to battle belly fat. It can even be difficult for those of us who eat a fairly healthy diet and can take some time. If you struggle with a bit of belly flab, don’t despair. These easy yoga moves will come to the rescue.
Yoga has been used as an exercise for over 5,000 years. According to WebMD, Yoga is a full body workout that tightens and tones the muscles, along with calming the mind. There are more than 100 different yoga forms, some that are simple and some complex. If you try these exercises daily, you will be amazed with what it does for your midsection.
1. Board (Kumbhakasana)
This is as close to a full body workout in a single post as you can get. It focuses on the abs, along with the back, shoulders, thighs and buttocks.
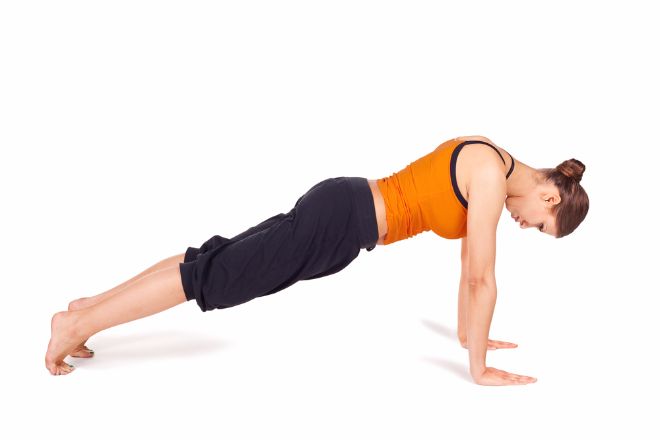
Step 1: Start in a pose similar to a push-up with your arms
extended under your knees and hands positioned under your shoulders
and arms.
Step 2: Breathe in as you gaze ahead of your hands. Take care to
keep your back and spine straight.
Step 3: Keep your hands flat and your fingers spread as you pull in
your abdominal muscles.
Step 4: Remain in this position for 15-30 seconds before releasing
to your knees.
Step 5: Repeat this pose 5 times with a 15-second break in
between.
2. Wind Easing Posture (Pavanamukthasan)
This posture is typically used for easing lower back pain. It can also strengthen the hips and thighs, along with working on the abs. There is some thought that this pose can balance pH levels and boost the metabolism
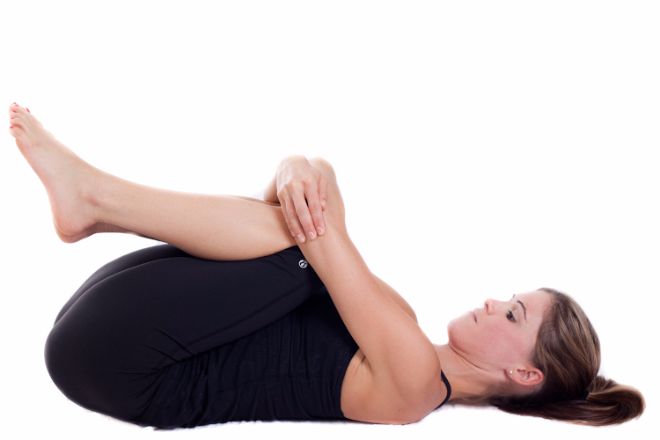
Step 1: Lay on your back with your legs stretched out with your
heels touching each other and your arms at your side.
Step 2: Breathe out as you bend your knees as you move them toward
your chest.
Step 3: Hold your knees as you pull them closer into your body
Step 4: Tighten your thighs and apply pressure to your abdominal
muscles as you hold the position.
Step 5: Hold the position for 60-90 seconds as you breathe
deliberately and deeply.
Step 6: Breathe out and release the knees as you allow your arms to
rest on your side.
Step 7: Repeat 5 times with a 15-second break between each
pose.
3. Pontoon Posture (Naukasana)
This exercise helps the abs indirectly by focusing on the leg and back muscles. It helps to reduce abdominal fat stores
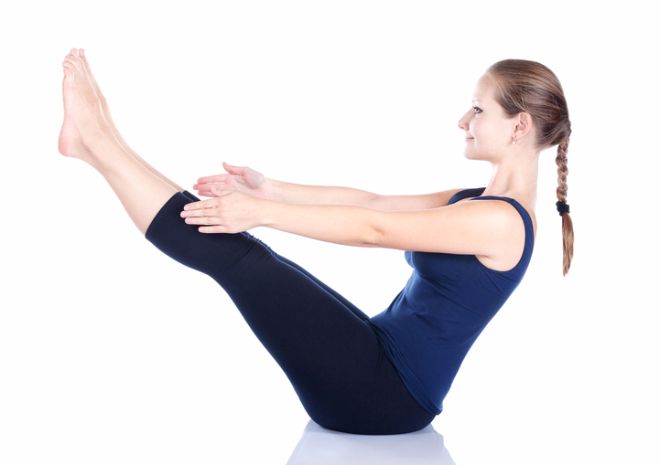
Step 1: Start in a lying position on your back with your legs
stretched out and your arms down at your side.
Step 2: Inhale as you lift your legs up while stretching your toes
and feet. Your legs should remain straight.
Step 3: Form a 45-degree angle with your body by reaching your arms
toward your extended legs.
Step 4: Breath normally as you hold the post for 15 seconds.
Step 5: Release the pose and allow your body to rest for 15
seconds.
Step 6: Repeat the pose 5 times with a rest in between each
one.
4. Bow Posture (Dhanurasana)
This exercise can strengthen and tighten the abdominal muscles. It also helps to promote healthy digestion and boosts energy.
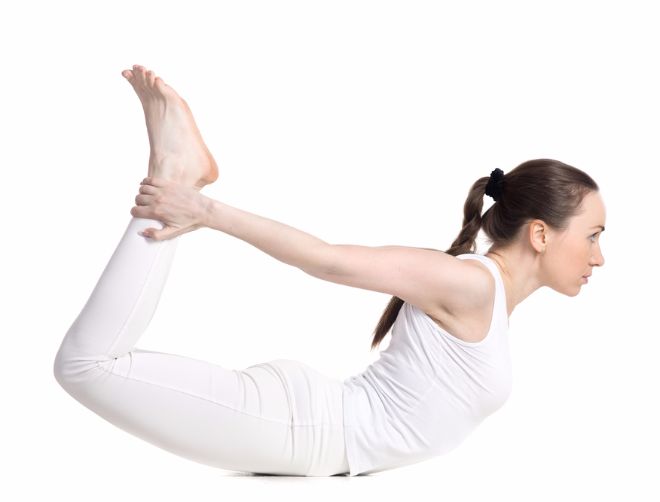
Step 1: Lay stomach down on the mat with your legs stretched out
and your arms to your side.
Step 2: Bend the knees upward while reaching your arms back to hold
your ankles or feet.
Step 3: Hold the position 15-30 seconds while breathing
normally
Step 4: Exhale and return to the laying position allowing your body
to rest for 15 seconds.
Step 5: Repeat 5 times with rest time in between each pose
5. Cobra Posture (Bhujang asana)
This pose works multiple muscles, strengthening the spine and upper body. People who have a back injury, hernia or are pregnant should not do this pose.
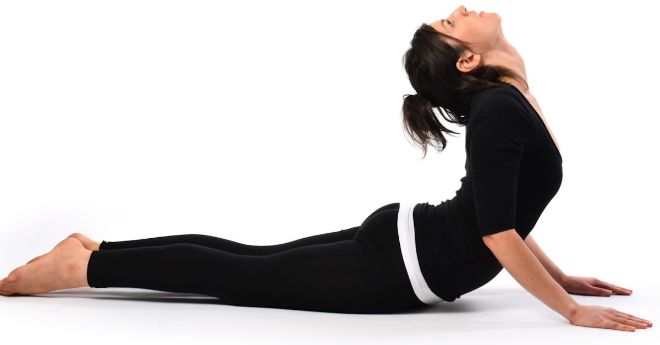
Step 1: Start by laying stomach down on the mat.
Step 2: Stretch your legs away from your body as you pull your arms
in under your shoulders
Step 3: Allow your toes and chin to touch the floor.
Step 4: Breathe in deep and slow as you thrust your body chest
upward.
Step 5: Hold the pose for 15-30 seconds and slowly exhale.
Step 6: Rest for 15 seconds.
Step 7: Repeat 5 times with a break in between each pose.
6. Boat (Naukasana)
This pose is a great workout for the back, arms, legs and abs
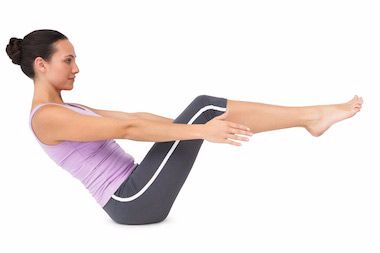
Step 1: Start by laying on your back with your legs stretched
and your arms at your side
Step 2: Breathe in deeply as you lift your chest upward and raise
your feet off the floor.
Step 3: Keep your gaze forward to encourage alignment in your
body.
Step 4: Hold this pose as you inhale and exhale 10 times.
Step 5: Repeat this pose 5 times with 15 seconds of rest in
between.
7. Chair (Uthkatasana)
This pose focuses on strengthening the spine and pulling in the abs. It is not recommended for those who suffer from knee or back injury. Those who have insomnia or chronic headaches may also want to avoid this exercise.
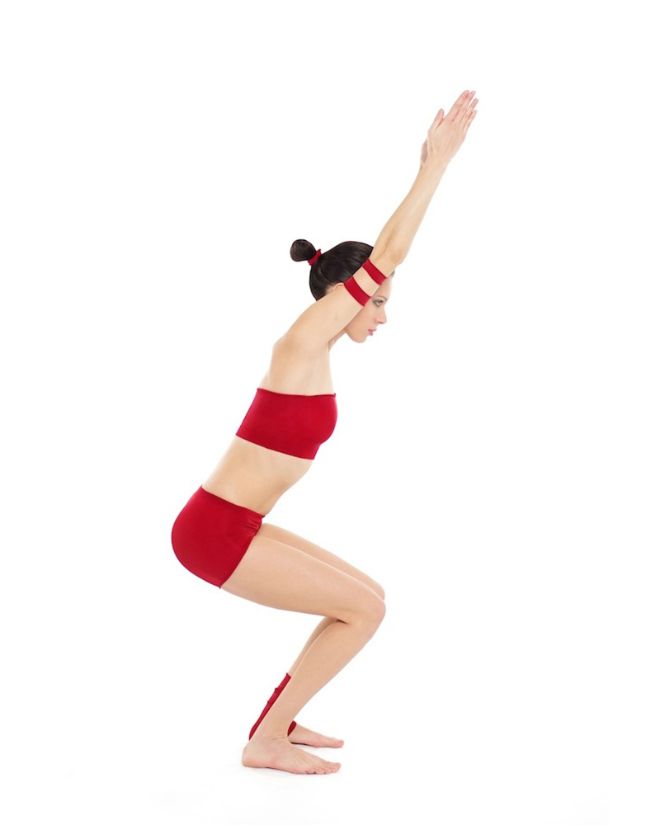
Step 1: Stand up straight with your hands in the Namaste
position in front of you
Step 2: Bend your knees as if you were sitting in a chair
Step 3: Raise your hands above your head.
Step 4: Bend your torso inward as you go deeper into the
position
Step 5: Breathe normally as you hold the position for as long as
you can.
8. Bridge (Setubandhasana)
This pose strengthens the spine and hips. It also stretches the abs. Some additional benefits include lower blood pressure, fewer menopause symptoms and improved digestion.
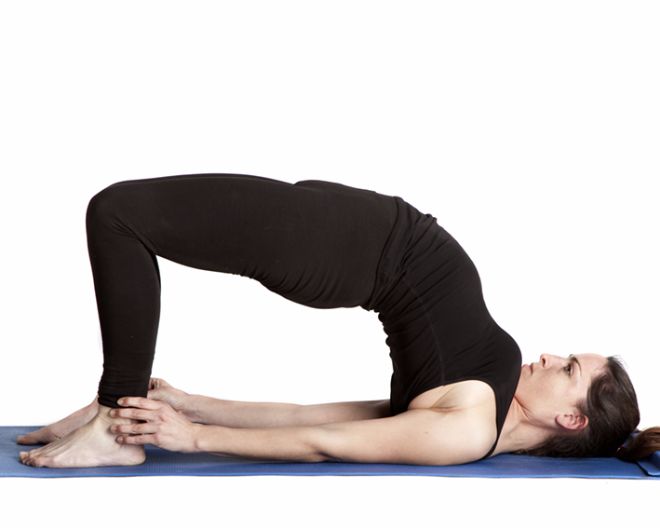
Step 1: Start by laying on your back.
Step 2: Exhale as you push off the floor with your feet.
Step 3: Raise your body so that your buttocks and back are off the
floor, but your neck remains down.
Step 4: Push your hands down on the ground for additional
support.
Step 5: Hold the position for as long as you can.
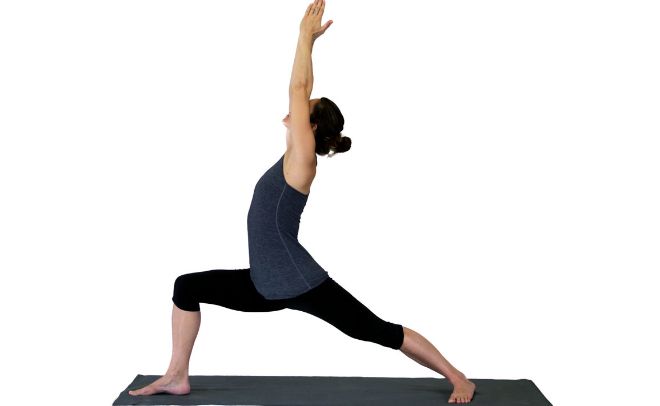
9. Warrior 1 (Veerbhadrasana 1)
A great exercise for strengthening the thighs, buttocks and core muscles. It can help to reduce belly fat and promotes peace and clarity.
Step 1: Begin in a standing position with your feet brought
together and your hands to your side
Step 2: Extend your right leg forward as you extend your left leg
backward similar to a lunge movement.
Step 3: Slightly turn your midsection so that you are facing your
bent right knee.
Step 4: Give your body added support by slightly turning your left
leg.
Step 5: Exhale and you raise your body up from your knees.
Step 6: Slowly stretch your arms upward as you bend your back to
create a slight arch.
Step 7: Remain in this position for 15-30 seconds as you breathe
normally
Step 8: Slowly break the pose by exhaling and straightening your
right knee. Push off your right leg and allow yourself to come back
gently into the original pose.
Step 9: Repeat for the opposite leg.
10. Warrior 2 (Veerbhadrasana 2)
Similar to warrior 1, it works best when it is combined with that pose.
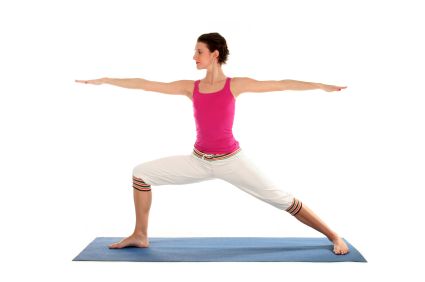
Step 1: Follow the same steps as above, but rather than raising
your hands above your head, extend them outward from your torso
Step 2: Turn your head so that you face toward your right leg.
Step 3: Repeat for the left leg.
Via: Remedy Daily
Be sure to share this with your friends on Facebook